Toxins in Tampons – $5 OFF a box of organic tampons!

The average woman uses over 11,000 tampons in her lifetime.
 
Let me be totally honest with you… A couple weeks ago is the first time I really started thinking about the chemicals in our environment and personal care products and their effect on our bodies. I was so concerned with the chemicals and artificial ingredients in our food system that I completely missed this HUGE issue that contributes to many of our diseases today – toxins.
 

Toxins are in our air, water, food, soil and products.

Out of those 5 sources, there are only a couple that we have control over – food and products are the big ones. I talk about food a lot so now I’d like to bring attention to our products – one product in particular – tampons.
 
Did you ever bother to look at the Tampax tampon website? I know I didn’t until recently. I’m going to pick on Tampax for a little bit. Their tampons “are made from the same ingredients as most other feminine care products on the market”. Just because other companies use them, does that make it right?
 
Tampax tampons are a cotton/rayon blend with polyethylene (plastic), polypropylene (thermoplastic polymer) and “fragrance ingredients like those found in other women’s products”. Not much transparency here…
$5 off tampons 
As consumers we have to do our research.
The cotton used in our tampons is non-organic (unless otherwise stated). Do you know what we use in the growing process? Let me tell you.
 
  1. GMO seeds are necessary in conventional cotton farming. The land used to grow cotton has not increased over the years, yet our cotton yield has increased by 300%.
  2. Seeds are treated with fungicides and insecticides.
  3. Once planted, synthetic fertilizers aid in the growing process.
  4. Weeds and pests are controlled with herbicides, insecticides and pesticides.
  5. Finally, we harvest the cotton and use more toxic chemicals to remove the leaves.
From this end product, we make tampons and other products.
 
Let me say this again – we use over 11,000 of tampons in our lifetime! The toxins add up ladies!
 

Let’s do a little experiment:

Go grab one of your tampons (trust me you won’t want to use them anymore after this). Unwrap it and place it in a glass of water. After it absorbs the water, remove it, and watch all the remaining fibers floating in the water. These toxin-laced fibers are hanging out in your uterus each time you use a tampon.
 
Side note: your skin is the largest organ in your body. On top of that, your lady parts are especially sensitive and highly permeable.
 
What does that mean? It means that traces of the above chemicals used to grow cotton leach into your body and can have nasty effects.
 
Earlier I touched on the ingredients in Tampax tampons, lets go back to that real quick and talk about why they are bad.
  • The use of viscous rayon (the only rayon allowed in tampons) has the ability to amplify toxins to some extent.
  • In the US, we spray more than one billion tons of pesticides and herbicides on cotton crops yearly.
After harvesting and processing there are residual chemicals that remains on tampons. These can have damaging effects to the nervous system, lead to cancer and even hormone disruption. An example of hormone disruption is high levels of estrogen hormone. This is linked to a higher risk of developing endometriosis and fibroids.

Bonus to buying organic tampons:The lowest risk of developing Toxic Shock Syndrome is with the use of all cotton tampons.

As of now the FDA does not require testing for toxic levels of chemicals in tampons and does not require package warnings.

I hope you leave here feeling like an educated consumer – click this referral link for $5 off a box of organic tampons by SHE, a company created by three sisters who saw a need for a product that is better for us and for our environment.

$5 off tampons


References:

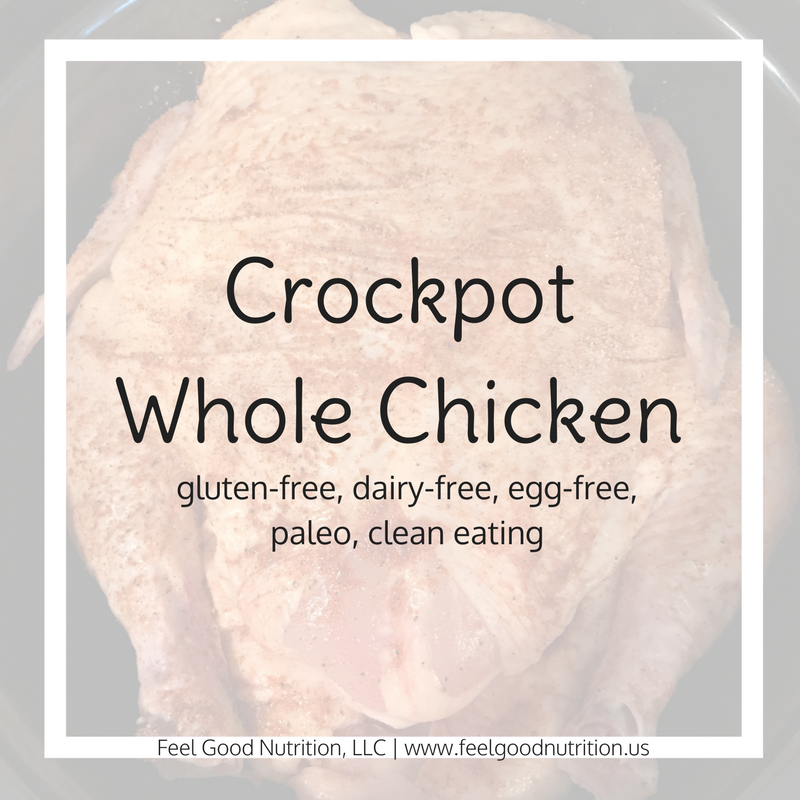
Crockpot Whole Chicken

Crock-Pot Whole Chicken

Crockpot Whole ChickenWe are closing out national slow-cooking month with a crock-pot whole chicken recipe!
 
I have always been a sucker for rotisserie chicken. To the point that I have priced out my own rotisserie for the day when I have a huge, glamorous kitchen worthy of my kitchen appliances. When I saw a recipe for crock-pot whole chicken I just HAD to try it!
 
Most of the recipe I’ve seen have a rub with tons of ingredients. In my blog I focus on only creating recipes that have ingredients tested in my food sensitivity blood test. This makes it easier for my clients as they are searching for recipes to make with their results! Having limited foods is hard enough – you pretty much have to be a Chopped Master Chef to create a cohesive meal.
 
One of my favorites things to do is create recipes from random ingredients and find a way that they can work together. During consultations, I often get carried away coming up with cohesive meal ideas. The hardest part is the start of the elimination diet. We try to stick to 25-30 foods for the first two weeks.
 

Yes – only 25-30 foods – and that includes their spices!

Anyway, sorry for that tangent, back to what I was saying. I made this crockpot recipe with my go-to spice blend. I have a pretty major sensitivity to garlic and I do my best to avoid it when possible. This blend has great flavor and I don’t even miss the garlic!

Crock-pot Whole Chicken
 
Prep time
Cook time
Total time
 
Author:
Serves: 1 chicken
Ingredients
  • Whole Chicken
  • Aluminum foil
Paprika-Onion spice blend
  • 1T paprika
  • 2 tsp salt
  • 1 tsp black pepper
  • ½ tsp onion powder
Instructions
  1. Rinse chicken thoroughly and remove any insides. Pat dry with paper towel.
  2. Mix all spices in a bowl until combined.
  3. Rub the seasoning blend onto the chicken – top and bottom!
  4. Roll up a few balls of aluminum foil and place in the bottom of your crock-pot – this will raise the chicken up so that it is not sitting in its juices.
  5. Place the chicken on top of the foil balls.
  6. Cover and cook on high for 4 hours.
  7. Chicken should be cooked until it reaches an internal temperature of 160F or the juice runs clear.
  8. Be careful when removing the chicken from the crock-pot. I used tongs to pull it out. If the chicken is cooked too long it will fall apart because it’s so tender! This tastes great but makes it hard to take the chicken out in one piece.
Notes
I have found the best results cooking on high for 4 hours. Last time I cooked on low for 8-9 hours it all fell apart. Again, it tasted great! But it was a pain to sift through the chicken meat and bones.

If you want to cook vegetables at the same time you can quarter or half large onions and potatoes to give the chicken something to sit on.

One of the reasons I love making a whole chicken is so that I have leftovers for days! Try my chicken pot pie with your leftovers!


Alternatives:
Protein
– try with turkey breast
Flavor Enhancer – use your favorite food sensitivity friendly spice blend!


Products:

Also try our crockpot quinoa enchilada in your crockpot!


What’s your favorite crockpot meal?

Enjoy!

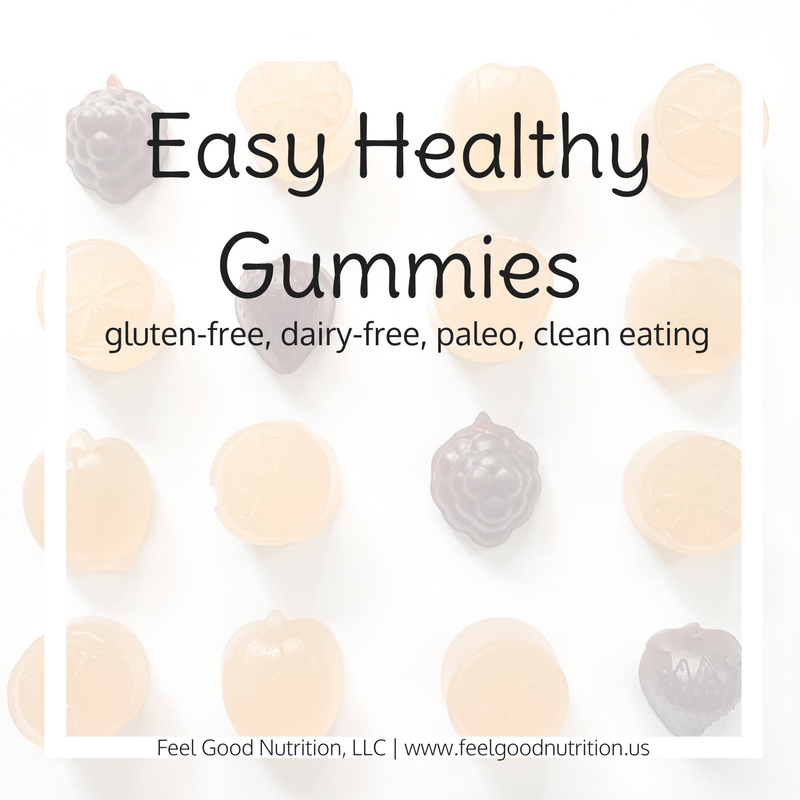
Easy Healthy Gummies

Easy Healthy Gummies

Easy Healthy Gummies

I’m so glad I found these easy healthy gummies!

Gummies were always a go to candy when I was younger. I remember my brother and I having competitions on long car rides to see how many gummies we can fit in our mouths. Kind of gross now that I think about it!

I stopped eating gummies for years until recently I found that they can actually be HEALTHY! I’m not talking about gummies you buy in the candy aisle that contain corn syrup, artificial colors, citric acid. These are easy, homemade and healthy!


Bonus: they taste better than the chemical laden store bought gummies!


I tested a lot of gummy recipes to find the perfect combination of ingredients. One thing I found is that you have to use ingredients that allow you to concentrate the flavors . Many recipes I see call for 100% fruit juice + added sweetener. When I made them they do not provide enough flavor in the end product!

These gummies are packed with flavor!


What makes these gummies healthy?
  1. Make your gummies with beef gelatin powder. This helps improve gut health and digestion, protects joints, improves skin health, heart health and helps you feel full.
  2. I sweetened them with raw honey. Honey has antioxidants to prevent cell damage, natural allergy relief and it boosts immunity!
  3. My Lemon-Ginger gummies are a great source of vitamin C and lemon juice aids in digestion. Ginger is often used for indigestion and to calm an upset stomach.
  4. My Orange-Cranberry gummies are another great source of vitamin C and phytonutrients. They have significant antioxidant properties. Cranberry juice is most often associated with providing relief from UTIs. There are also cardiovascular health benefits, digestive benefits and many more!

I used these fun Fruit Shack gummy molds but any molds will do!

Easy Healthy gummies
 
Clean eating healthy gummies that you don't have to feel guilty about eating!
Author:
Ingredients
Lemon-Ginger Gummies
  • ⅔ C lemon juice
  • 1.5oz gelatin
  • 6 Tbsp raw honey
  • 1 tsp grated ginger
Cranberry-Orange Gummies
  • 2 Tbsp honey
  • 2 Tbsp cranberry concentrate
  • Fill to 1 cup with 100% orange juice
  • 1 tsp orange zest
  • 1.5oz gelatin
Instructions
  1. Add liquid to pot.
  2. Sprinkle gelatin over liquid and let sit for 3-5 minutes to bloom.
  3. Heat and stir to dissolve gelatin – do not boil!
  4. Fill gummy molds or pour in thin layer in a 9x13 pan
  5. Refrigerate for 30 minutes to cool.
Notes
Makes two trays of “fruit shack” gummies per batch. If using a gummy bear mold – ¼ cup makes about 50 gummies.

No gummy molds? You can pour the gummy mixture into 9x13 pan and cut into squares or use cookie cutters when cooled!

**Nutrition information is not provided due alterations that can be made to accommodate food sensitivities.


Products:


What is your favorite flavor of gummies?

Enjoy!

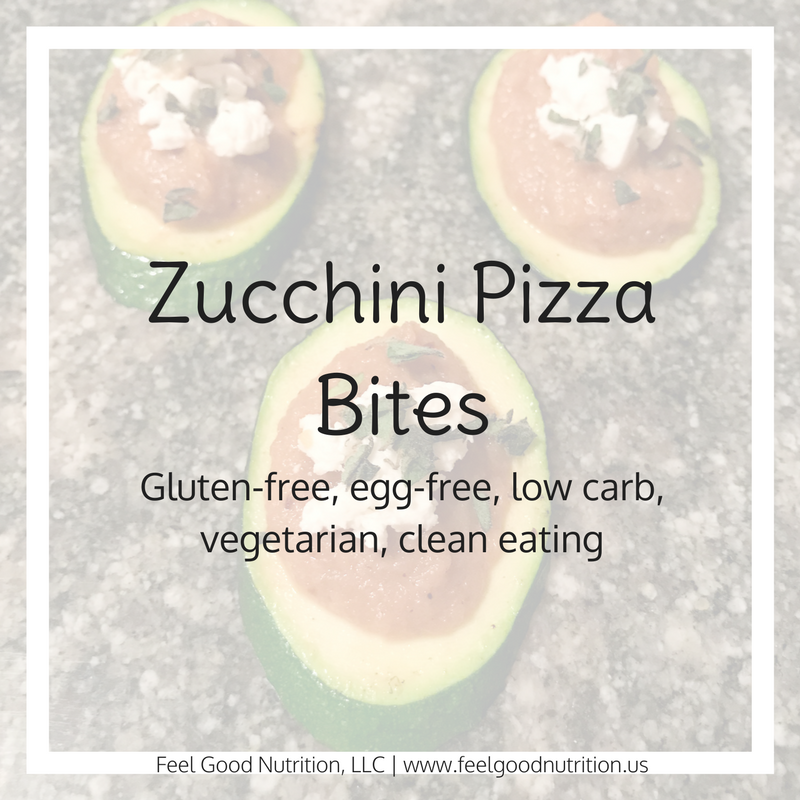
Zucchini Pizza Bites

6-Ingredient Zucchini Pizza Bites

Zucchini Pizza BitesHappy National Pizza Week!

Until now I didn’t know National Pizza Week existed but I can’t say I’m sad about it! This gave me an excuse to create a new healthy “pizza”-like recipe. So below I bring you ~ Zucchini Pizza Bites with Sauteed Onion Puree and Goat Cheese

I know you can’t wait for this recipe.
Keep reading or just scroll down to the recipe – I won’t be mad!

Throughout the years I have experimented with different carriers (crusts) for pizza and different sauces – some have been better than others. I’ve made my own pizza dough, eggplant pizza, zucchini pizza, cauliflower pizza, quinoa pizza bites, pesto pizza, bbq chicken pizza – ya dah ya dah ya dah. I love pizza because there are endless possibilities. No matter what your food restrictions are I’m confident that we can find a pizza that works for you!

carrier + delicious sauce + cheese = Pizza

My zucchini pizza bites are a take on the standard zucchini pizza but with my food-sensitivity-accommodating twist!

Here are some of the food sensitivities I avoid when attempting to make pizza:

  • Tomatoes – There are a lot of ‘no-mato’ sauces for people who are sensitive to nightshade vegetables. Different varieties are made with beets, carrots, red bell peppers, etc. I can’t say that I have ever had them but have been wanting to make beet ketchup soon! Stay tuned!
  • Garlic – To find recipes without garlic is nearly impossible most of the time. One trick that I use is to search “Low-FODMAP – insert food here” – i.e Low FODMAP pizza sauce, etc. This is a great place to start and then you can narrow down after that.
  • Olives – This eliminates olive oil. Depending on their use, it is pretty easy to replace the requested oil with any allowed oil. In my recipes I try to list the oil as “allowed oil” unless a specific oil is needed for flavor or texture – like sesame oil, which has a very strong flavor.

Anywho…

I made a New Years Resolution to myself to pay close attention to my food sensitivities because my symptoms of IBS are getting worse again – which happens when you get careless – oops! The worst thing about it is that I have total control over it but for several months had chosen to ignore it – I blame the holidays. Being able to control my symptoms and feeling good everyday makes it all worth it!


Here’s to the New Year, New Year’s Resolutions and Pizza 🙂

6-Ingredient Zucchini Pizza Bites
 
Enjoy this 6-ingredient pizza bite recipe! Great for an appetizer at a family get together or just make a full plate for yourself!
Author:
Ingredients
  • 1 Tbsp allowed oil
  • 1 Zucchini - cut diagonally into ¼-inch slices
  • 1 Yellow onion - sliced
  • ¼ Cup chicken/vegetable broth
  • 1oz Goat cheese
  • Fresh oregano - chopped
Instructions
  1. Heat allowed oil in pan. Sautee onions until soft and golden brown - about 10-12 minutes
  2. Place sauteed onions and ¼ cup broth into blender and blend until smooth. I used my immersion blender which worked great!
  3. Place zucchini slices in the pan that was used to sautee onions. Cook each side for 2-3 minutes. The zucchini should be lightly browned on each side but not soft.
  4. To assemble pizza put a dollop of onion puree on top of the cooked zucchini (You can put as much or as little as you would like depending on your taste!), place crumbled goat cheese on top of onion puree and garnish with chopped oregano.
Notes
Nutrition information is not provided due alterations that can be made to accommodate food sensitivities.


Alternatives:
Carrier – I bet this would taste AH-mazing on a wheat or gluten free traditional pizza crust, eggplant rounds, yellow squash slices, or cauliflower crust
Toppings – you can use any variety of cheese like gruyere. Pair it with sauteed mushrooms!


Products:

Here is another great recipe that you can make with an immersion blender: 5-Ingredient Cauliflower Soup


What’s your favorite kind of pizza?

Enjoy!

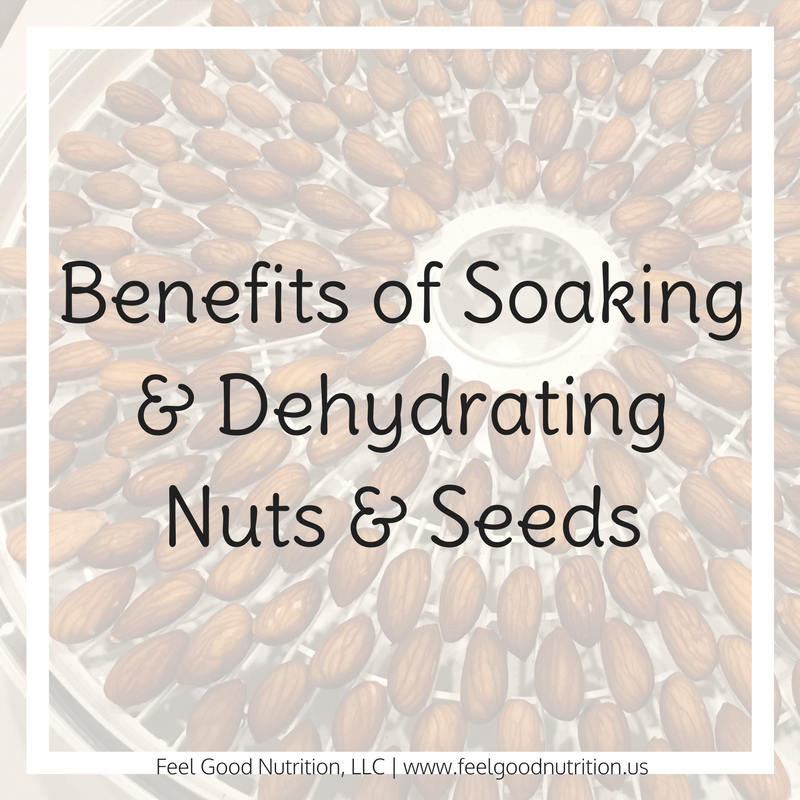
Soaking and Dehydrating nuts and seeds

Benefits of Soaking and Dehydrated Nuts and Seeds

Soaking and Dehydrating nuts and seedsMost of us eat nuts and seeds on a daily basis – whether it is in the form of nut/seed butter, nut milk, or just plain old nuts and seeds. This tiny little nutrient packed superfood has found its way into many diets, however, to truly gain all of the benefits they require an extra step prior to your enjoyment!

Why not eat raw nuts and seeds?
Raw nuts (and seeds) contain phytic acid – the storage form of phosphorus in plant tissues. So why is this a problem? Phytates binds to minerals in your GI tract which can cause irritation and contribute to potential nutrient deficiencies. Of course you could take phytase in the form of a supplement – like Pure Encapsulations Digestive Enzyme Ultra – every time that you eat nuts and seeds but I think there is a simpler (and cheaper) answer! Before we get to that there is one more big reason to soak and dehydrate your nuts and seeds. Raw nuts also contain enzyme inhibitors, which prevent the nut or seed from sprouting prematurely in nature. This is great for the nuts in nature but when they have been gathered for consumption something has to change. Eating too many raw nuts that still contain enzyme inhibitors can contribute to the binding of minerals and again lead to digestive strain.

How does soaking and dehydrating help?
Soaking raw nuts and seeds in salt water and then dehydrating at a low temperature (around 105-115F) tricks the phytates and enzyme inhibitors into a neutral state. The combination of minerals and low heat helps break down irritating compounds, while preserving beneficial fats and proteins. This process increases the bioavailability of important nutrients (notably the treasured B vitamins) and activates helpful digestive enzymes that increase nutrient absorption. If you do not want to complete this process yourself it is possible to purchase, however, the cost can be significant in comparison to purchasing raw nuts and soaking/dehydrating them yourself.

If you look to purchase these nuts, they are different from sprouted nuts as sprouting is a much lengthier process.

If you’re not sure if you need to soak/dehydrate your nuts, here are a few questions that might be able to help direct you:

  • Do you ever experience low belly pain after eating nuts, seeds or foods that contain them?
  • Do you ever notice pieces of nuts in your stool the day after eating them?
  • Do you eat a significant amount of phytate containing foods- such as grains, beans, nuts and seeds?
  • Do you struggle to consume enough minerals and B-vitamins in your diet?
  • Do you eat a lot of phytate-containing foods and your micronutrient test came back showing a deficiency in B-vitamins and minerals?

If you answered yes to any of the above questions, you will likely benefit from soaking and drying nuts prior to snacking on them.

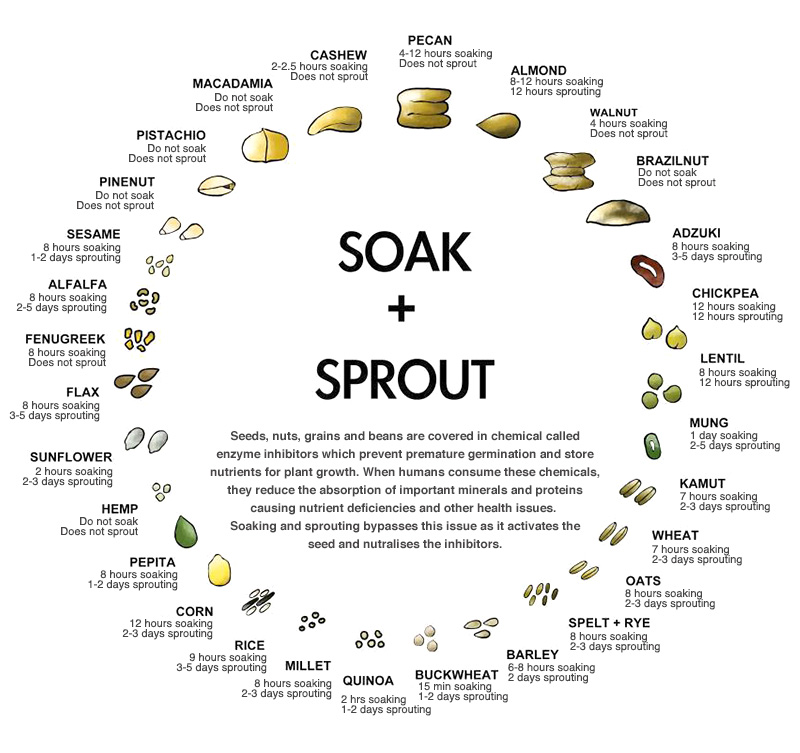
Below is a great graphic that indicates the time that nuts/seeds should be soaked – and if you feel like going the extra mile you can try sprouting!
To prepare your nuts/seeds for soaking, first measure out 4 cups of raw nuts into a bowl. Cover with filtered water and mix in 1 TBSP of sea salt. After soaking, place nuts/seeds in your dehydrator at 105-115F for 12-24 hours. Throughout this process I find myself snacking! Turn off the dehydrator when your nuts/seeds have achieved a crunchy texture and no longer seem water-logged 🙂

Keeping the temperature under 118F maintains its “raw” status and does not comprising any of the nutrients. If you do not have a dehydrator you can dehydrate nuts in your oven at its lowest temperature – preferably at least close to 150F. Continue to watch your nuts as time will vary based on method of dehydrating.

soaking-and-sprouting-nuts-and-seeds


Products:


Let us know which nuts/seeds you dehydrate!

Enjoy!

Tzatziki Dip

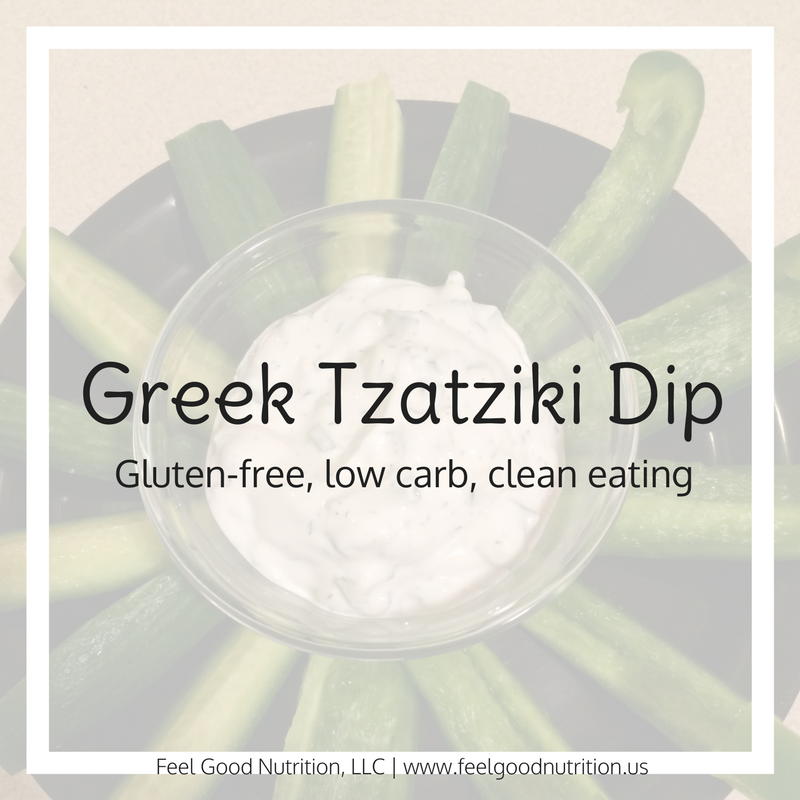
Greek Tzatziki Dip

Tzatziki DipToday I spent the day shopping and cooking. It was a wonderful day but now my feet hurt! I started the day making my enchilada sauce and mac and cheese (for Brandon) and then I had to go searching for our Halloween costumes. We’re going to a Halloween party on Friday night and yes, we have waited until now to decide on our costumes. We decided to be robbers… easy right? no! I would have never thought it would be so hard to find a long sleeve black and white striped shirt for a man.

Anyway, I have been doing a lot of reading/listening to webinars and research about the role of fat in our diet and how the current nutrition guidelines are essentially killing us. Ever since the 90’s when we went through the low-fat craze the rate of obesity has been increasing exponentially. Why? Because when the food industry removes fat from their foods it tastes like cardboard – so they add sugar in its place! Snackwells cookies anyone?

So here is a novel thought. We should be eliminating refined carbohydrates from our diet (i.e. sugar, white bread, etc) and adding more fat! I’m not talking about fat from fast food items, or processed goods but instead eating more avocados, eggs, nuts and healthy oils like olive oil and coconut oil.

As I listen and read all of this research I have been tweaking my diet to include more nuts and not being afraid to eat more avocado. I think it is safe to say that I am consuming considerably more calories but I have already lost 2 pounds! I’m not starving myself or logging my calories but instead being conscious of my carbohydrate intake and choosing full fat options when I have them – like full fat cheeses and milks. I am trying to keep my carbohydrate intake to 60-100g per day but this is plenty if you are not eating bread, pasta, and other heavy carb meals.

A calorie is not a calorie! Food is information for your body and everything is interpreted differently.

Greek Tzatziki Dip
 
Author:
Ingredients
  • 2 C full fat plain greek yogurt
  • 1 lemon, juice only
  • 2 cloves garlic, minced
  • 1 Tbsp allowed mild oil
  • ½ tsp salt
  • ¼ tsp pepper
  • 1 cucumber, deseeded and finely diced
Instructions
  1. Combine all ingredients in a bowl and mix to combine.
  2. Refrigerate until ready to serve.
Notes
Nutrition information is not provided due alterations that can be made to accommodate food sensitivities.


Alternatives:
Most of the ingredients in this recipe are needed for a traditional tzatziki. If you are sensitive to garlic, this could be omitted but understand the flavor will be different than traditional. The pepper can also be omitted without much change to the recipe.
Oil substitute – use any mild oil here – liquid coconut oil, olive oil, nut oils, etc.


What’s your favorite Greek food?

Enjoy!

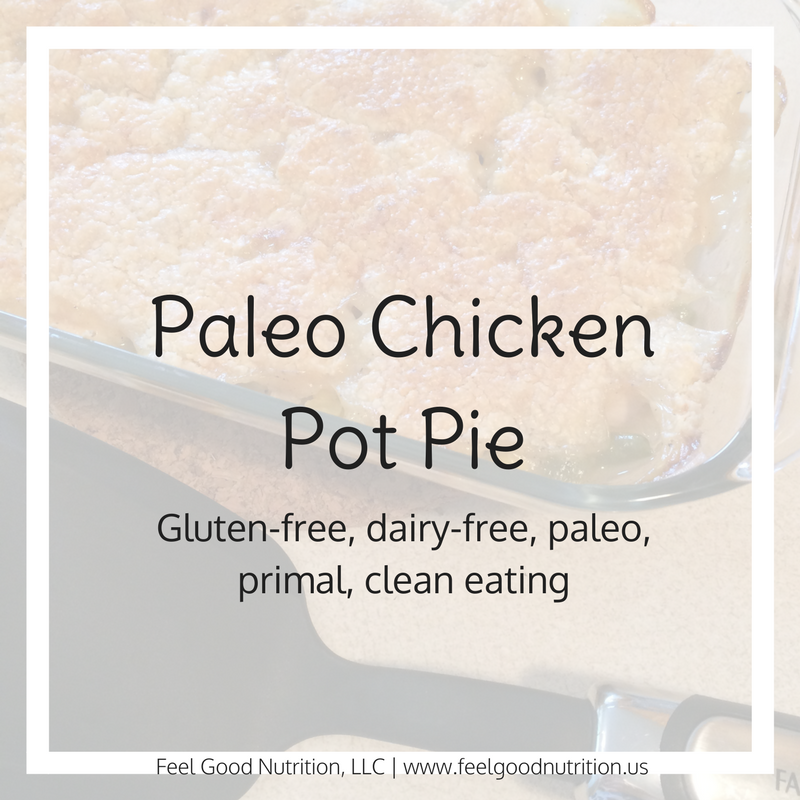
Paleo Chicken Pot Pie

Chicken Pot Pie

Paleo Chicken Pot PieThis morning I woke up and it was very overcast and cold outside. I made tea and sat at my kitchen table to study Chemisty – just like I do every weekend. This week I have been testing out a hydrolyzed beef protein powder from Designs for Health called PurePaleo meal – its a true paleo protein source. They offer whey protein, pea protein and their newest product is a hydrolyzed beef protein! I had to try it because most other most protein powders I can’t tolerate. I am lactose intolerant so whey protein is no good. I am sensitive to green peas, so I try to stay away from pea protein. I guess a soy isolate would work but beef protein was intriguing!

This product contains beef from animals raised in Sweden without hormones or antibiotics, and is free of any GMO grains, grasses, and/or ensilage. Besides the normal benefits of protein power this powder also has added collagen to help support muscles, cartilage and ligaments.

DISCLAIMER: I do not promote Paleo as a superior diet, however, I do believe that a low carbohydrate, clean diet can help kick start the weight loss process and help eliminate water weight up front to see quicker results and help motivate you to continue.

Anyway – I digress – I wanted to tell you about my Chicken Pot Pie. While trying this PurePaleo protein and I am trying to maintain a paleo diet but felt that the cold weather required some comfort food and thus paleo, gluten-free, dairy-free chicken pot pie was born.

About coconut oil
When shopping for coconut oil pay attention to the label. There is a definite difference between virgin coconut oil and refined coconut oil.
       Virgin Coconut Oil – made from fresh coconut meat which contributes a very pure coconut flavor. It has a lower smoke point and is best for baking when you want the coconut flavor.
      Refined Coconut Oil – made from dried coconut meat and is great for sauteing, stir-frying and baking. It has a higher smoke point and a neutral flavor.


Use the leftover chicken from our crockpot chicken recipe to make chicken pot pie later in the week!

Chicken Pot Pie
 
Author:
Ingredients
For the Crust:
  • ¾ C blanched almond flour
  • ¼ C tapioca flour or 2 tbsp corn starch
  • ½ tsp salt
  • ¼ tsp homemade baking powder (2:1 ratio cream of tartar to baking soda)
  • ¼ C refined coconut oil, cold butter or organic palm shortening
  • 2 tbsp cold water
For the Filling:
  • ½ lb leftover chicken, cut or tear into bite size pieces
  • 1 cup allowed vegetables, bite size
  • 2 tbsp refined coconut oil, butter
  • ⅓ C chopped onion
  • 2 tbsp tapioca flour or 1 tbsp corn starch
  • ¼ tsp salt
  • pinch black pepper
  • pinch paprika
  • ¾ C chicken broth (Swanson chicken stock is a great clean broth!)
  • ¼ C allowed milk (I used homemade coconut milk)
Instructions
For the Filling:
  1. Preheat the oven to 375 degrees.
  2. In a saucepan, cook onions in coconut oil/butter until tender.
  3. Stir in tapioca flour/corn starch, salt, pepper and paprika.
  4. Slowly stir in chicken broth and allowed milk. Simmer over medium-low heat until thickened like gravy.
  5. Remove from heat and set aside.
  6. Place chicken pieces and chosen vegetables in a bowl. Stir in gravy mixture.
  7. Pour mixture in 9x6 pan (8x8 or small casserole pan should also work).
  8. Take out crust if completely chilled - if not ready, throw it in the freezer for a couple minutes! Cold dough will make it easier to work with (less sticky).
  9. Pat handfuls of dough into palm-sized discs and piece together over filling. If you have extra dough, fill in the cracks.
  10. Place on a baking sheet in case it bubbles over and bake in oven for 35-40 minutes until crust is golden brown. I placed mine under a broiler for a couple minutes to get a nice golden brown color.
Notes
Easily double this recipe for a 9x13 pan.

If you have a deeper pan add additional chicken and vegetables. This will decrease calories per serving, increase protein per serving and fill you up more!


**Nutrition information is not provided due alterations that can be made to accommodate food sensitivities.


Alternatives:
This recipe has so many possibilities for customization!
Thickening Agent: as listed in the recipe, corn starch and tapioca flour can both be used to thicken sauces. If you are not looking for a paleo or gluten-free recipe wheat flour can also be used!
Baking Powder: Store bought baking powder often contains corn starch. If sensitive to corn it is best to make your own in a 2:1 ratio (listed above) and keep this to use in place of store bought. Note: cream of tartar is a byproduct of wine making so only use it if you are not sensitive to grape.
Protein: any other leftover protein would work here! Beef (I would use a beef broth to make filling gravy), pork, turkey.
Vegetables: green beans, corn, broccoli, potatoes, carrots, cauliflower, green peas. I used canned green beans and frozen corn because I had it on hand. This is your opportunity to make it your own! If using fresh vegetables, pre-cook them before adding to filling. Omit onions if you do not tolerate them.
Milk: any milk would work here!

There are so many possibilities that I’m sure I am missing some! Let me know if you try something different!


Products:


Let us know what you tried in your pot pie!

Enjoy!

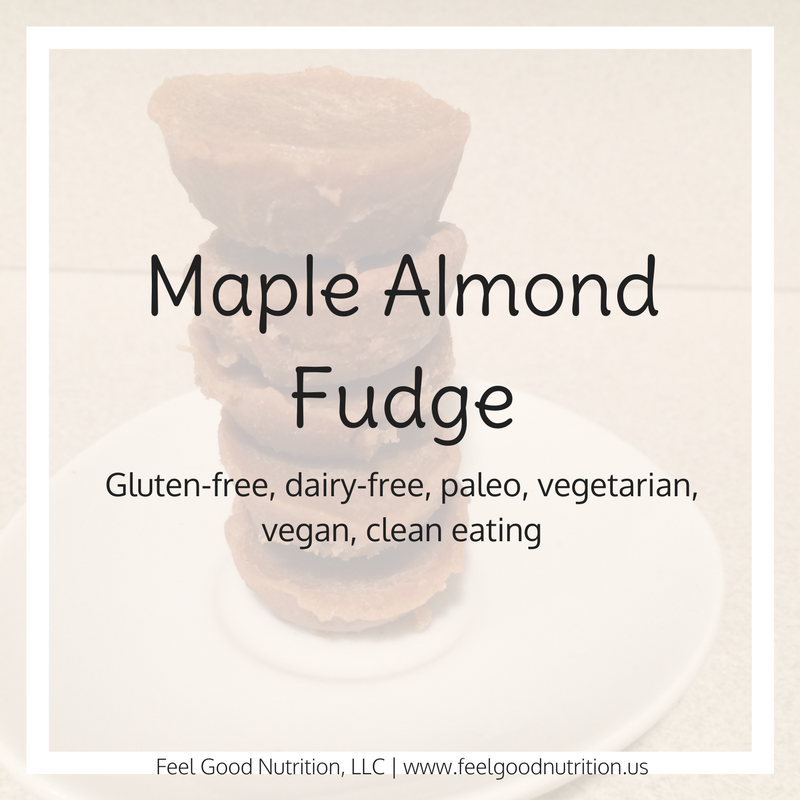
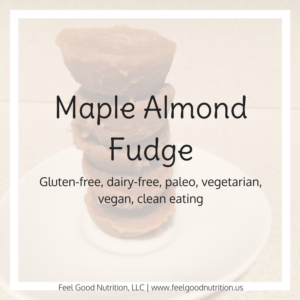
Maple Almond Fudge

Maple Almond Fudge

Maple Almond FudgeWell as much as I tried I couldn’t hold on to fall very long. Leaves are covering the street and its been nasty cold lately (like 60’s and rainy cold)! Being in Chicago it will only get worse but I was enjoying the nice summer we had. Come Fall I always think of hot beverages (I mostly drink hot water… I know, weird.) I do have a weakness for fudge – the nerd in me wants to call it my kryptonite – but maybe that’s because I just finished binge watching Supergirl on Netflix.

Anyhow, I came across a fudge recipe the other day and just had to make it! This fudge recipe called for coconut oil, cashew butter and honey which sounded amazing but because of my sensitivity to fructose that was not going to happen. Honey is 100% fructose! So, I modified it! I love having an understanding of food and being comfortable changing ingredients because it opens up the world of food! You can make pretty much anything you want 🙂

Well, through my modifications I came up with Maple Almond Fudge – yumm!

Maple Almond Fudge
 
Author:
Ingredients
  • ¼ cup coconut oil
  • 3 tbsp pure maple syrup
  • ½ cup almond butter
Instructions
  1. Melt coconut oil on low heat in a small pot.
  2. Add maple syrup and almond butter.
  3. Stir until smooth and all incorporated.
  4. Pour into small pan or individual cups and place in refrigerator to solidify.
Notes
Nutrition information is not provided due alterations that can be made to accommodate food sensitivities.


Alternatives:
Nut butter – any allowed nut butter can be used!
Sweetener – maple syrup, honey, or brown rice syrup can be used to sweeten these babies 🙂

**Coconut oil is an important ingredient – this is what keeps the fudge solid. You can use coconut butter in its place if you have it on hand!


Products:


Did you make any variations? We would love to know what you tried!

Enjoy!

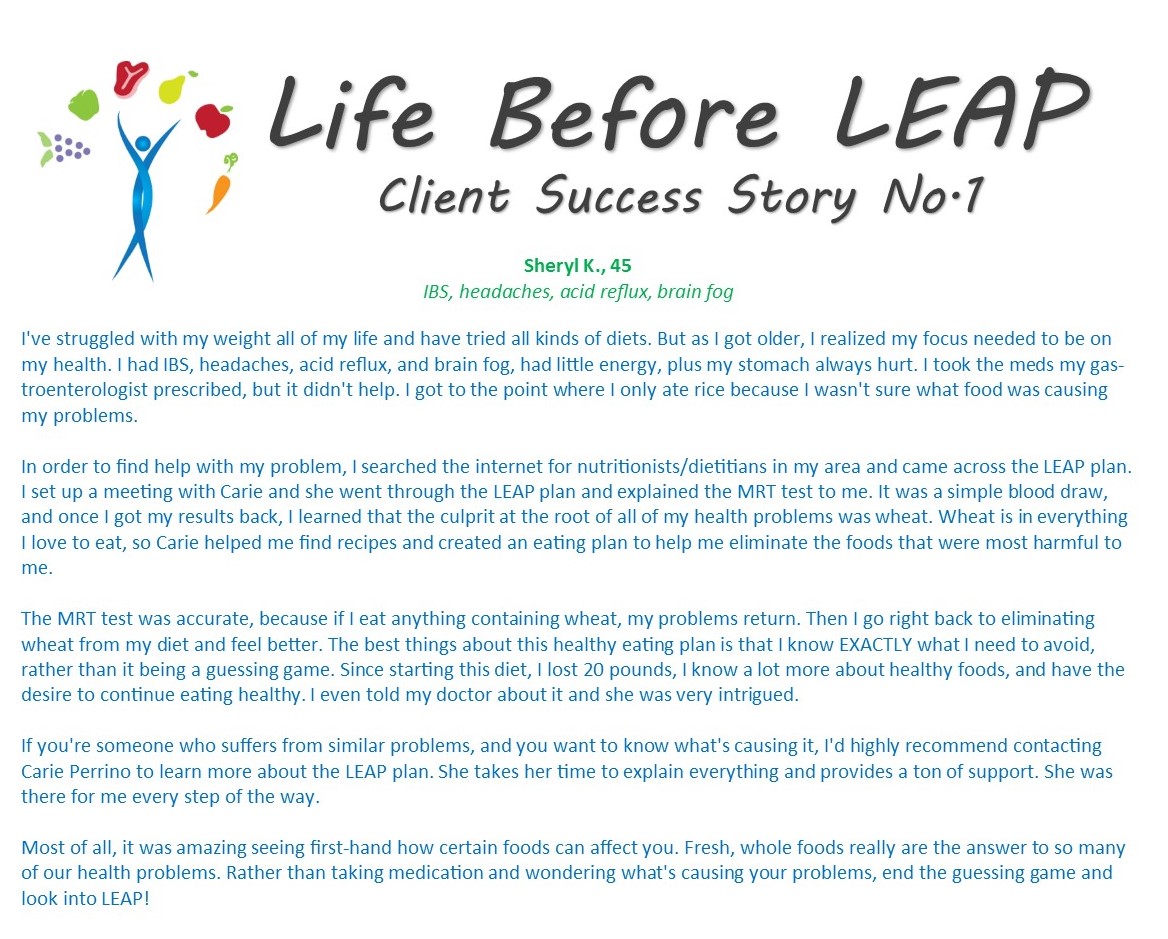
Life before LEAP – No. 1

Meet Sheryl!

Sheryl is a 45 year old school teacher and single mother of two girls. She just wanted to be a good role model for her kids but didn’t know where to begin. She did not have the energy to workout and had a hard time losing weight. Sheryl suffered from IBS, acid reflux and chronic brain fog. When she came to me she was nervous because she didn’t cook much and didn’t know much about food. After we received her results we looked through some cookbooks and discussed how to modify recipes so that they worked for her. Sheryl cut out wheat from her diet – probably the hardest thing anyone has to to because it is so prominent in our lives. But she found that by doing this she had more energy. She enjoyed cooking with her girls and teaching them about food and recipes and even started taking her girls to the gym!

Here is Sheryl’s story.

client-1-sk

Look for more to come!

Interested in my story? I too suffered from IBS and used LEAP to help me find symptom relief and allow me to live my life! Read my story here.

Knowledge is Power.

This week I wanted to take a break from the recipes and talk about the importance of knowledge.

Knowledge is power.

The more we know the better choices we can make. This is especially important when it comes to our health. Did you know that nearly 75% of all deaths in the US are attributed to just 10 causes. 10… I can count that on two hands (or feet). The top 3 are responsible for 50% of deaths. That’s a lot of death!

top-10-causes-of-death

What kills me is that most of this boils down to HEALTH. The leading cause of death in the United States is heart disease (coronary artery disease, heart attack, congestive heart failure – just to name a few). I work in a hospital and it is almost surprising when a patient does not have one of these diagnoses. Everyday I talk to people about what foods contain carbohydrates, protein and fat (No… chicken is not a carbohydrate). Let me tell you – if you know the answer to this question you are ahead of most… sadly.

I understand that not everyone has a passion for nutrition like I do but don’t we all want to live a long life?! Maybe its just me…

I think the blame could go in a lot of directions – lack of education in school systems, processed food industry insisting that more chemicals are better (they’re not.), lack of curiosity on the part of every individual. Now a days we all have internet and we are all capable of a Google search.

Lets bring this down to a personal level.

There are many other common conditions out there that may not lead to death. I bet each and every one of you know someone who suffers from chronic headaches or migraines, irritable bowel syndrome, fibromyalgia, multiple sclerosis, arthritis… the list goes on. Depending on the severity these conditions can be debilitating. They may prevent you from leaving your house or having the social life you deserve.

With all of the chemicals and mixed foods that we are eating, food sensitivities are a common culprit. I’m not naive to say that it will cure your MS or completely eliminate your arthritis, however, I am 100% confident in saying that eliminating the foods that are contributing to your problem will help you manage the arthritis pain, allow you to leave the house without worrying where the closest bathroom is, and live your life like its supposed to be lived.

In the two years that I have been practicing LEAP I have had so many clients with great success. Periodically I will be sharing their success stories with you so that maybe, just maybe, you decide that its finally time to step up or convince a friend or family member that they need to learn about what is contributing to their uncomfortable symptoms.