Homemade fudgesicles

Dairy Free Fudgesicles – customize your own!

Homemade fudgesicles

Now that its summer we all want ice cream, right?

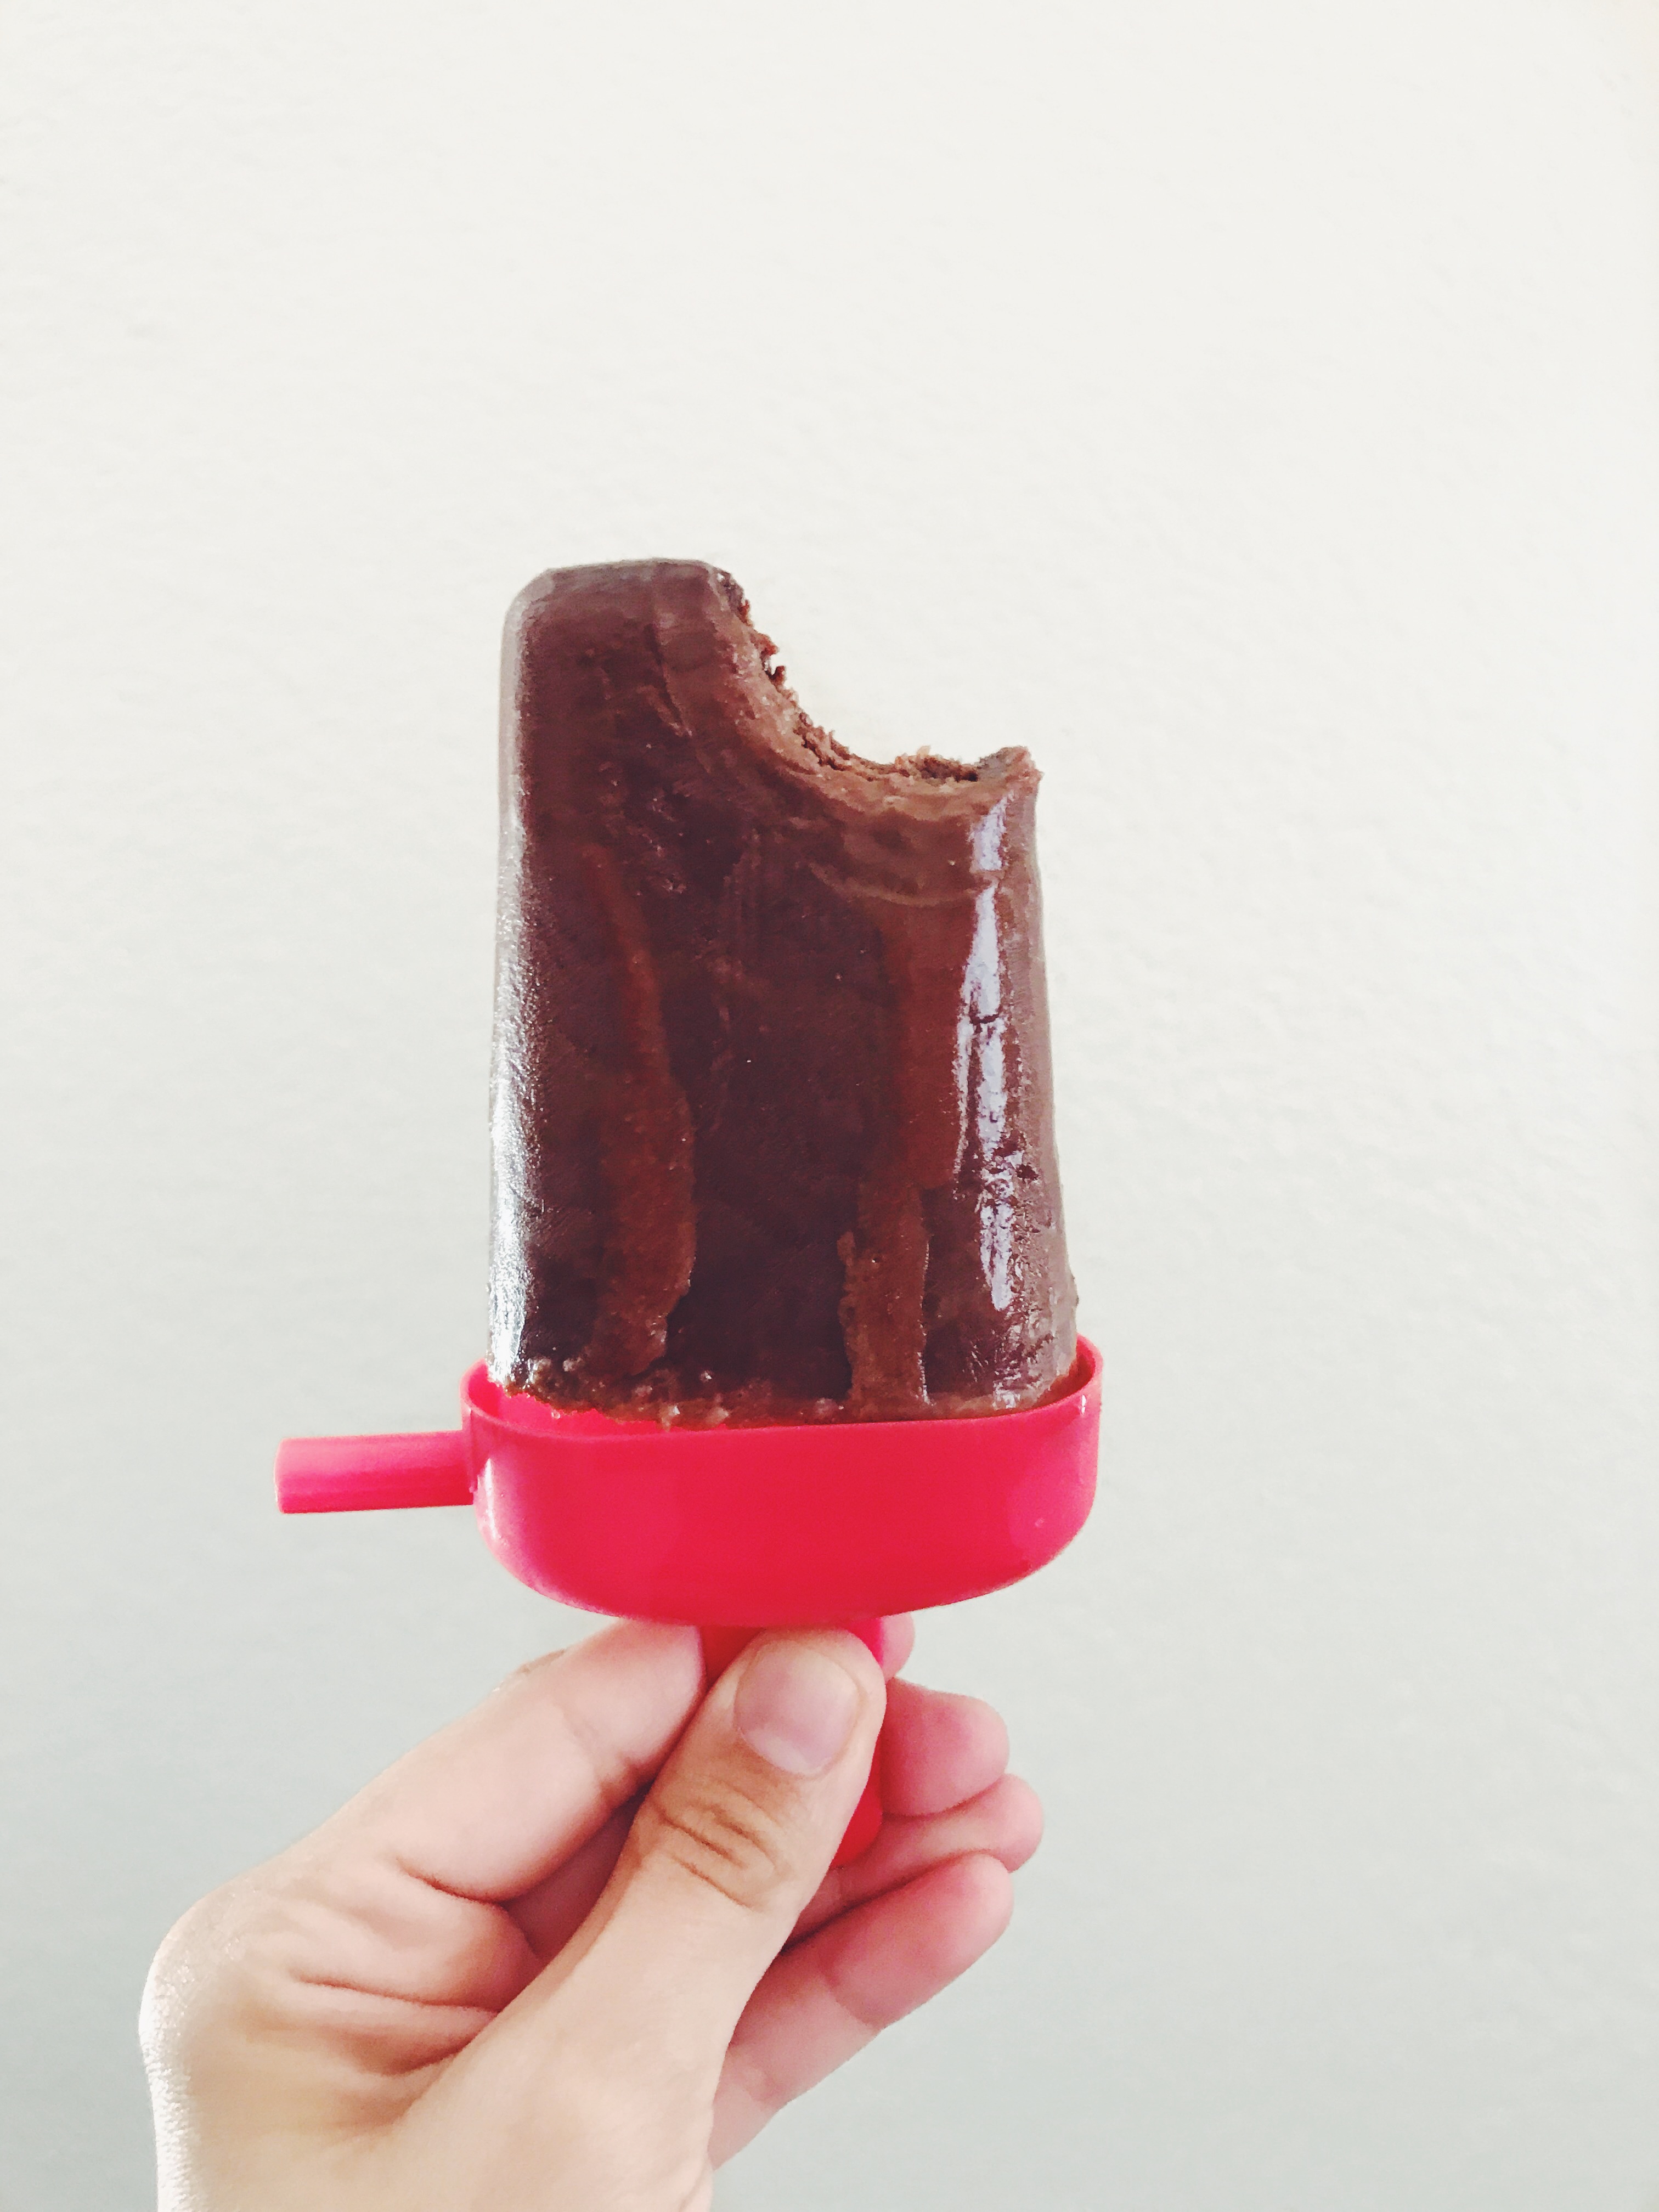
I always thought I hated chocolate ice cream but one thing I love is fudgesicles in the summer time! Who am I kidding, how could I hate chocolate ice cream?

Brandon and I keep hearing the ice cream truck pass by our house but I swear it makes sure that we are not outside because we are usually outside most days of the week and he never drives by when we want him too!

This weekend I got creative and tailored a standard fudgesicle recipe to my food sensitivity results and then I got to thinking. How can I make this even more customize-able!? I want everyone to be able to eat fudgesicles if their heart desires.

what your heart desires

And fudgesicles make me happy.


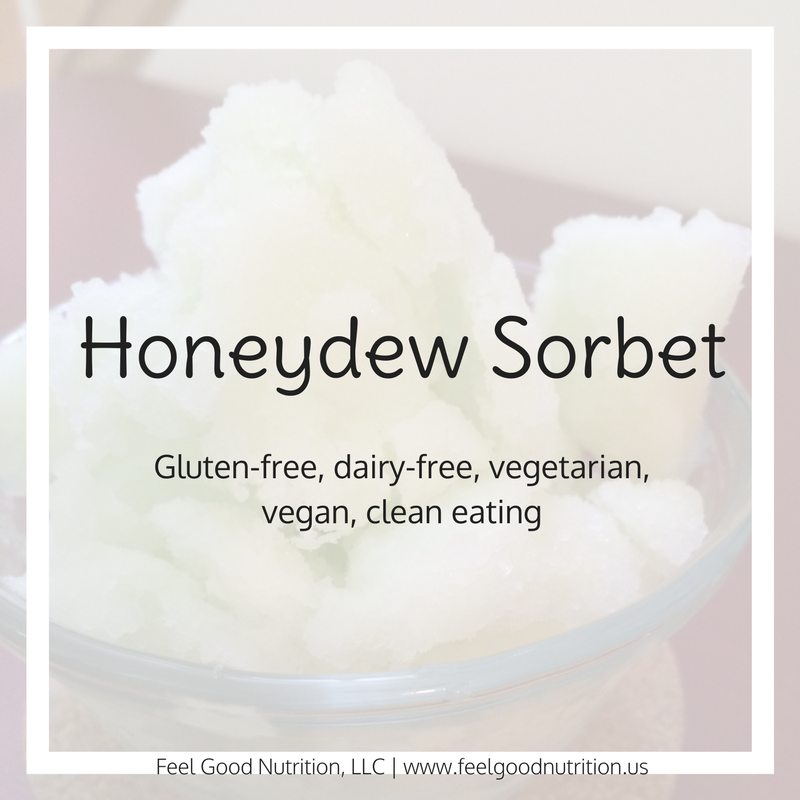
But I guess, I do like other desserts too – like this sorbet 🙂

Dairy Free Fudgesicles
 
These fudgesicles are super chocolaty and perfect for a hot summer day!
Author:
Recipe type: Dessert
Ingredients
  • ½ C cocoa powder or carob powder
  • ¾ C allowed granulated sweetener
  • 2 Tbsp allowed liquid sweetener
  • 1 tsp flavor extract
  • 2 C allowed milk
Instructions
  1. In a pot, whisk together the granulated sugar and cocoa or carob powder.
  2. Add the liquid sweetener and flavor of your choice.
  3. Turn the stove on medium heat and pour in your milk.
  4. Whisk until chocolate and sugar are dissolved. The mixture does not have to boil but the heat helps it dissolve better.
  5. Pour into popsicle molds.
  6. Place in freezer until solid.
  7. Enjoy!
Notes
Nutrition information is not provided due alterations that can be made to accommodate food sensitivities.


Alternatives:
Milk: whole fat coconut milk or 2% or whole cow’s milk – you need some fat!
Granulated sweetener: cane sugar, blonde coconut sugar, beet sugar
Liquid sweetener: corn syrup, brown rice syrup, honey, maple syrup, cassava syrup, coconut nectar, homemade simple syrup – I use this recipe to make my simple syrup
Chocolate: you can also use carob powder for a caffeine free version!
Flavor Extract: vanilla, almond, mint would all be great flavors – I would use ½ tsp if you use mint because it is strong.


Products:


Enjoy!

fudgesicle

Comparing Milks and Making Your Own Milk Alternatives

June is national dairy month so in the spirit of this month let’s take a look at the different milk options that are available. This is a big conversation with my food sensitivity clients and we really try to make milk out of pretty much anything! Even if you are not a milk drinker per say (like me) it is always nice to have a type of milk around for smoothies, baking and cereals.

Before we started getting creative and blending up everything into milks we only had cow’s milk, well I guess goats milk too but that is not very common.


Cow’s Milk

Cow’s milk comes in many varieties: whole, 2%, 1%, skim (fat-free) and lactose-free. The component that makes each of them different is their fat content and therefore the calories as well.

Each type of cow’s milk has the same protein, calcium, vitamins and minerals however, choosing fat-free milk will affect the absorption of some of the vitamins that require fat (vitamins A, D, E and K).

Lactose-free milk is processed in a way that breaks down the lactose sugar that is found naturally in milk. It still has all of the nutrients listed above. About 65% of the population is lactose intolerant, meaning they do not make adequate amounts of the enzyme, lactase, to break down the milk sugar. Symptoms of a lactose intolerance include abdominal pain, bloating, flatulence, nausea, and diarrhea 30 minutes to 2 hours after consuming a lactose-containing product. For these people, lactose-free milk would be a great option.


Soy Milk

Soy milk is made from soybeans and water. It is a plant-based milk and therefore it is free of cholesterol and very low in saturated fat. It is naturally lactose free.

Soy is a controversial topic because of its estrogenic effects but the current thought is that it is still ok in moderate doses. I would limit to 1 serving of non-GMO organic soy per day but I have heard others say 2-3 servings per day.

Too much soy can be a problem for those with thyroid conditions and may prove harmful for women with a history of estrogen-receptor positive breast cancer. Other than that, moderate consumption of soy products are rich in Omega-3 fatty acids and can be part of a heart healthy diet.

There is a great recipe from Rasa Malaysia (hint: its only soybeans + water)


Don’t have time to make your own? Here are a couple brands that I recommend to make your lives easier ?. They are all made from whole, organic non-gmo soybeans and water.

  • Westsoy organic unsweetened soy milk
  • Edensoy organic unsweetened soy milk
  • Pacific organic unsweetened soy milk


Almond Milk

Almond milk made from almonds and water. It is lower in calories than most other milks and also free of saturated fat. It is naturally lactose free.

Even though whole almonds are a good source of protein, almond milk is not a good source of protein or calcium.

Store bought almond milk often contains carrageenan, a thickener and emulsifier. Some studies have linked carrageenan to increased inflammation in the body and often stomach problems.

Since it is not recommended to buy the cartons of almond milk at the store, here is a very simple recipe from Danette May to make your own!


Coconut Milk

Coconut milk is made from unsulfured, unsweetened coconut meat and water. It is a plant-based milk however, it does contain more fat than other milk alternatives. It is naturally lactose free.

The type of fat found in coconut milk is medium-chain triglycerides (MCTs) which have gained in popularity over the past several years.

Just like other store bought milk alternatives, coconut milk often contains added thickeners and other ingredients like carrageenan which has its negative effects.

Making your own coconut milk is as easy as 1-2… that’s it! Wellness Mama has a great recipe that I use!

If you choose to skim off the fat from your coconut milk you can make it into a wonderful coconut whipped cream for dessert.


Rice Milk

Rice milk is made from rice and water. It has very little protein and fat but is higher in carbohydrates than the milk alternatives discussed above.

This is a good choice for those who are lactose intolerant and/or have allergies to milk, soy, or nuts.

Rice does contain higher levels of arsenic that is taken up from the soil while it is growing. Because of this it is not recommended to rely on only rice and rice products. Be sure to focus on consuming a variety of other grains throughout your day.

As with other store bought milks, you can expect to see added thickeners and preservatives to improve shelf life and consistency. For this reason it is best to make your own and it is very easy!

Money Saving Mom  has a great recipe that helps you plan ahead so that you don’t have to cook rice every time you want to make your milk!


Other Milk Alternatives

If none of those sounds appetizing or work with your food sensitivities here are 9 other milks that you can make at home!

Sunflower seed milk

pecan milk

oat milk

banana milk

cashew milk

hemp seed milk

flax milk

hazelnut milk

pea milk


Resources:

My dietetic degree

https://ghr.nlm.nih.gov/condition/lactose-intolerance

https://www.healthyeating.org/Milk-Dairy/Nutrients-in-Milk-Cheese-Yogurt/Nutrients-in-Milk.aspx

http://www.pcrm.org/health/cancer-resources/ask/ask-the-expert-soy

https://www.drweil.com/diet-nutrition/food-safety/is-carrageenan-safe/

Oatmeal Breakfast Cookies

Oatmeal Breakfast Cookies

Oatmeal Breakfast CookiesI’ve always struggled with finding a quick and easy breakfast that fits with my food sensitivities. Then I came across these cookies, made some modifications to meet my food sensitivities and BAM – my oatmeal breakfast cookies were born ?.

I started making these cookies a couple of years ago and got my whole family hooked – I even gave them out as Christmas presents! Oh the life of a poor post grad… Those were the days when it was acceptable to give cookies for family Christmas presents.

These past couple of weeks on the new job have been great…and busy! I love my cancer patients and survivors about a healthy diet but I am so glad to keep my private practice and continue my work with food sensitivity clients.

With my busy schedule of work during the day and food sensitivity clients in the evenings and weekends I am always looking for quick, healthy meals. I had forgotten about these cookies until recently and I’m excited to bring them back and share with all of you.


Oatmeal Breakfast Cookies
 
These cookies are great frozen!
Author:
Recipe type: Breakfast
Ingredients
  • 1.5 C whole rolled oats
  • 1 C unsulfured, unsweetened coconut flakes
  • 1 Tbsp chia seeds (optional)
  • ½ tsp salt
  • ½ tsp cinnamon (optional)
  • ¾ C coarsely chopped allowed nuts OR ½ C nuts + ¼ C LEAP friendly chocolate chips
  • ½ C allowed dried fruit
  • 1 C unsweetened applesauce OR 3 ripe mashed bananas
  • ¼ C coconut oil or other mild allowed oil
  • 1 Tbsp allowed liquid sweetener
  • 1 tsp pure vanilla extract
Instructions
  1. Preheat oven to 350 degrees.
  2. Place parchment paper on large cookie sheet.
  3. Combine all the dry ingredients in a large bowl then add all the wet ingredients. Mix well until combined.
  4. Form cookies – about 2 tablespoons each – onto the cookie sheet.
  5. You can place them all on one pan because they do not spread so keep them close together.
  6. Bake about 25 minutes until golden brown then cool completely on the pan.
Notes
Nutrition information is not provided due alterations that can be made to accommodate food sensitivities.


Alternatives:
The chia seeds and cinnamon are optional. Leave them out if you have not added this into your diet or do not know if it is a potential trigger food.

Allowed nuts – chopped pecans, chopped walnuts, or sliced almonds might be good options
Allowed dried fruit – banana chips, chopped unsulfured apricot, dried cranberries, dried blueberries
Allowed liquid sweetener – maple syrup, honey, brown rice syrup, corn syrup, tapioca syrup


Products:


What do you eat for breakfast?

Enjoy!

Grain-free, Egg-free Chocolate Chip Cookies

Grain-free, Egg-free Chocolate Chip Cookies

Grain-free, Egg-free Chocolate Chip CookiesWe have finally arrived in sunny Arizona! Here is a picture that I took on our drive. Wegrain-free, egg-free choc chip cookies took a wrong turn and ended up on 50+ miles of switchback road through the mountains. It was getting dark so this was not a fun part! We made a short stop to let our cars cool down and this was the view that we had :).

Isn’t it pretty!

Yesterday I put my kitchen gadgets away and got organized so naturally the first thing I did this morning was bake chocolate chip cookies (isn’t that what anyone else would do?).
 
This drive was not easy – 27 hours total! We split it up over 3 days but sitting for so long really tested my patience… and my hip flexors. I brought a couple healthy snacks like pistachios, dried apricots and corn nuts.
Side note: Yes, I know corn nuts are not healthy. 

https://feelgoodrd.com/wp-content/uploads/2017/04/Safe-Snacks-for-road-trip.png


Meals were difficult because on road trips you’re expected to eat fast food, right? I brought food with me but that only lasted so long. I tried to pick the best foods for me which consisted of hamburgers, French fries and unsweetened ice tea. Based on my food sensitivities, that was the best option. I know that I can handle bread, beef and potatoes. The frying oil was questionable but all went well!
 
Some may ask why didn’t I get a salad? And the answer is that I have a lot of foods that cause my IBS to flare up, several of them are the proverbial “healthy” foods. There are so many ingredients in a salad, not to mention the dressing. At a minimum there is lettuce, tomato, cucumber, carrots. Then you add salad dressing, which is an oil, vinegar, and a boat load of spices – which typically includes garlic. In this short list, I am sensitive to tomato, carrots and garlic. These are some of my biggest triggers so I went the safe route and ate a hamburger and French fries.
 
Now back to cookies!
Our pantry is sparse right now but I managed to alter a recipe from The Food Fanatic to meet my food sensitivities as well as my clients.

Grain-free, Egg-free Chocolate Chip Cookies
 
Author:
Recipe type: Dessert
Ingredients
  • ¼ C coconut oil (solid)
  • ¼ C allowed liquid sweetener
  • ½ tsp pure vanilla extract
  • ¼ tsp salt
  • ¼ tsp baking soda
  • 5 Tbsp coconut flour
  • ¼ C almond flour
  • ¼ allowed chocolate chips
Instructions
  1. Preheat oven to 350F. Line baking sheet with parchment paper.
  2. Mix together solid coconut oil, allowed liquid sweetener, vanilla and salt.
  3. Add baking soda, coconut flour, almond flour and mix until combined. Stir in chocolate chip cookies.
  4. Let cookie dough sit for 5-10 minutes so that coconut flour can absorb the moisture.
  5. Place cookie dough on prepared baking sheet in 1.5-2 tsp portions. Using your finger, spread out the cookie dough (they don’t spread like traditional cookies)
  6. Bake for 8-10 minutes or until golden brown. Let sit on baking sheet for about 5 minutes before moving to cooling rack. These cookies will be soft right out but as they cool they become chewy and delicious.
Notes
Nutrition information is not provided due alterations that can be made to accommodate food sensitivities.


Alternatives:
Allowed liquid sweetener – honey, maple syrup, rice bran syrup, tapioca syrup, corn syrup
Almond flour – try cassava flour or make your own sunflower seed flour


Products:


What is your favorite sensitivity-friendly cookie recipe?

Enjoy!

Apricot Cherry Vegan Protein Bars

Vegan Protein Bars – Cherry and Apricot

Apricot Cherry Vegan Protein BarsAfter my month long hiatus I’m coming at you with some pretty amazing vegan protein bars. This month has been busy and I have not had much time to try new recipes or even cook much!
 

So many things that happened this month:

  1. WE’RE MOVING! I accepted a great job in Phoenix, AZ as an Integrative Dietitian. I will be working at an Integrative Oncology Center associated with MD Anderson. *Pinch me!*
  2. I became a consultant for Beautycounter. This company blew me away when I learned about them! They are growing fast and making a huge splash in the beauty industry. They have high standards for their products. One thing I loved was that they placed 1500 chemicals on a Never List. This is a list of chemicals they will never use because of their harmful or potentially harmful effects on the body. (More on this later I’m sure!)
  3. I recently came back from a trip to Punta Cana, Dominican Republic. It was a blast but talk about a challenge for those us of with IBS! I was sick with stomach pains for a good part of the trip but I tried not to let that interfere with the fun. My food sensitivity test results allowed me to make smart choices. It was difficult when I didn’t know the ingredients in meals and sometimes it was hard to avoid. Nevertheless, I have a new love for cassava/yucca because that’s what I ate most of the time. I’m excited to experiment with it now that I’m home and make some awesome recipes!
 
Whew! That was a lot but now I’m back and getting back into the swing of things ?
 
Okay so back to these amazing vegan protein bars that I touched on early. I wish I could claim this recipe but I have adapted it from Lindsay Cotter at her blog: Cotter Crunch. She specializes in healthy, gluten free cooking and has some pretty amazing recipes!
 
I try to post recipes that contain ingredients found on our food sensitivity blood test – there are 120 different foods so we try to stick with that. This recipes veers off a little. The one extra ingredient that is not tested is chia seeds. They add 6 grams of protein to the batch and some healthy fats but if you can’t have them then take them out! I will list them as optional in the recipe below.
If the recipe doesn’t 100% work for your food sensitivities make sure to scroll all the way down. I try to make my recipes very general so that they work for everyone. There are so many substitutions that can be made for this recipe so that it works for you!

Cherry Apricot Vegan Protein Bars
 
Author:
Ingredients
  • 1-15oz can whole chickpeas (rinsed and dried)
  • ½ C rolled oats
  • ⅓ C dried apricots (sulfite free if necessary)
  • ⅓ C dried cherries
  • 2 Tbsp chia seeds (optional)
  • 4 Tbsp allowed liquid sweetener - see substitutions for ideas
  • 1 tsp pure vanilla extract
  • ⅔ C allowed milk - see substitutions for ideas
  • dash of cinnamon (optional)
  • dash of salt
Instructions
  1. Preheat oven to 350F.
  2. In a food processor (or blender) combine oats, chia seeds and apricots. Blend until chopped. Empty contents into mixing bowl.
  3. In same food processor (or blender) add chickpeas. Blend until finely chopped (not pureed).
  4. Add chickpea meal to same mixing bowl.
  5. Mix in allowed sweetener, allowed milk, cinnamon, vanilla, salt, dried cherries. Batter will be very wet.
  6. Pour batter into greased 9x9 pan and spread out to even mixture.
  7. Bake at 350F for 30-40 minutes or until edges are golden brown and center is no longer soft.
Notes
Nutrition information is not provided due alterations that can be made to accommodate food sensitivities.

Vegan Protein Bar

Alternatives:
Oats – you can substitute with any rolled grain like quinoa flakes, barley flakes, rye flakes, spelt flakes, wheat flakes.
Dried fruit – this can also be other dried fruit. Dried apples, dried cranberries, dried blueberries, etc
Liquid sweetener – the recipe originally calls for 100% maple syrup or honey but if you cannot have either of these you can also use rice bran syrup, coconut nectar, corn syrup, cassava syrup
Allowed milk – this can be cow’s milk, any nut milk, oat milk, soy milk, etc


Products:


What’s your favorite homemade bar?

Enjoy!

Easy Healthy Gummies

Easy Healthy Gummies

Easy Healthy Gummies

I’m so glad I found these easy healthy gummies!

Gummies were always a go to candy when I was younger. I remember my brother and I having competitions on long car rides to see how many gummies we can fit in our mouths. Kind of gross now that I think about it!

I stopped eating gummies for years until recently I found that they can actually be HEALTHY! I’m not talking about gummies you buy in the candy aisle that contain corn syrup, artificial colors, citric acid. These are easy, homemade and healthy!


Bonus: they taste better than the chemical laden store bought gummies!


I tested a lot of gummy recipes to find the perfect combination of ingredients. One thing I found is that you have to use ingredients that allow you to concentrate the flavors . Many recipes I see call for 100% fruit juice + added sweetener. When I made them they do not provide enough flavor in the end product!

These gummies are packed with flavor!


What makes these gummies healthy?
  1. Make your gummies with beef gelatin powder. This helps improve gut health and digestion, protects joints, improves skin health, heart health and helps you feel full.
  2. I sweetened them with raw honey. Honey has antioxidants to prevent cell damage, natural allergy relief and it boosts immunity!
  3. My Lemon-Ginger gummies are a great source of vitamin C and lemon juice aids in digestion. Ginger is often used for indigestion and to calm an upset stomach.
  4. My Orange-Cranberry gummies are another great source of vitamin C and phytonutrients. They have significant antioxidant properties. Cranberry juice is most often associated with providing relief from UTIs. There are also cardiovascular health benefits, digestive benefits and many more!

I used these fun Fruit Shack gummy molds but any molds will do!

Easy Healthy gummies
 
Clean eating healthy gummies that you don't have to feel guilty about eating!
Author:
Ingredients
Lemon-Ginger Gummies
  • ⅔ C lemon juice
  • 1.5oz gelatin
  • 6 Tbsp raw honey
  • 1 tsp grated ginger
Cranberry-Orange Gummies
  • 2 Tbsp honey
  • 2 Tbsp cranberry concentrate
  • Fill to 1 cup with 100% orange juice
  • 1 tsp orange zest
  • 1.5oz gelatin
Instructions
  1. Add liquid to pot.
  2. Sprinkle gelatin over liquid and let sit for 3-5 minutes to bloom.
  3. Heat and stir to dissolve gelatin – do not boil!
  4. Fill gummy molds or pour in thin layer in a 9x13 pan
  5. Refrigerate for 30 minutes to cool.
Notes
Makes two trays of “fruit shack” gummies per batch. If using a gummy bear mold – ¼ cup makes about 50 gummies.

No gummy molds? You can pour the gummy mixture into 9x13 pan and cut into squares or use cookie cutters when cooled!

**Nutrition information is not provided due alterations that can be made to accommodate food sensitivities.


Products:


What is your favorite flavor of gummies?

Enjoy!

Honeydew Sorbet

Honeydew Sorbet

Honeydew SorbetLeaves are changing quickly and every morning it has been getting cooler… I’m so not ready for fall yet! This summer went by so quickly, we didn’t even get to a waterpark!

In a last ditch effort to bring back summer I thought I would make a light, refreshing summer-y dessert 🙂 Ice cream is always a go to during the summer but for those of us who are lactose intolerant, ice cream isn’t always a good idea. Don’t get me wrong, I crave (and eat) ice cream occasionally but its nice to eat dessert without feeling sick or having to run to the bathroom.

My honeydew sorbet is made with 3 ingredients (+ water… does that count?) and can be modified to meet your specific needs.

Honeydew Sorbet
 
Author:
Recipe type: Dessert
Serves: ½ gallon
Ingredients
  • 5 C honeydew, diced and chilled
  • ¾ C cane sugar
  • ¾ C water
  • 1 lemon, juiced
Instructions
  1. Create a simple syrup by heating sugar and water in a sauce pan. Pour the simple syrup in a container and refrigerate to cool. You can freeze to speed up the process - make sure not to freeze the syrup.
  2. Combine the chilled honey dew and simple syrup in a blender, add juice from 1 lemon and blend until smooth.
  3. Pour the contents of the blender into your ice cream maker and follow manufacturer instructions.
  4. Freeze sorbet until solid. Before serving, take sorbet out of the freezer about 5 minutes in advance.
Notes
Nutrition information is not provided due alterations that can be made to accommodate food sensitivities.

Making sorbet

Alternatives:
Fruit – Try using cantaloupe or watermelon to make the same different versions of this sorbet.
Sweetener – you can use honey in place of cane sugar in the same quantity. Be careful if you are sensitive to fructose! Honey is 100% fructose and so is fruit 🙂 You can also try an alternative sweetener (i.e. stevia) for a low calorie version of this refreshing dessert!


Also try our Diary-Free Fudgesicles for another delicious summer dessert!


Products:

Here is another great recipe to make with this product: Roasted Almond Chocolate Ice Cream


Let us know if you tried this with a different fruit!

Enjoy!

5-Ingredient Cauliflower Soup

5-Ingredient Cauliflower Soup

5-Ingredient Cauliflower SoupGrowing up my dad would always make soup with the Thanksgiving turkey leftovers or after having a roast chicken for dinner. They were always so good! I was intimidated by making soups but one day I just decided to jump in and try it out. At first I made a green chicken chili and then I royally screwed up a black bean chili (who knew a whole can of ancho chiles could be SOO spicy… whoops!)

There has been a big kick with cauliflower lately. Roasted cauliflower. Cauliflower “mashed potatoes”. Cauliflower pizza crust. etc. etc. etc. Well you should try my cauliflower soup! I wish I could get Brandon (remember.. the veggie hater) to even give it a try but because he knows the ingredients he won’t even give it a shot.

I like to cut up all of the ingredients first so that I can throw them all in the pan at the right time. After the soup cooks for about 20-25 minutes you will need to blend the soup so your cuts don’t have to be beautiful but they should be relatively uniform so that they cook at the same pace. It is not good to have some super mushy and others raw… been there, done that!


Heat 1/2 T of the oil of your choice in a heavy pot/dutch oven. For this recipe I would use a mild flavored oil: olive oil, unflavored coconut oil, sunflower oil, rice bran oil, corn oil.

Brown garlic and onion in the pot. This process takes about 5-7 minutes. Be careful not to burn them. Browning the onion and garlic gives the soup an additional depth of flavor.

Once brown, add broth and chopped cauliflower. I prefer to use my own broth if I have some available but in a pinch I do keep some clean broths on hand.


Here a couple of brands that I like:
Swanson Chicken Cooking Stock: chicken stock, salt, carrots, cabbage, onions, celery, celery leaves, parsley
Progresso Vegetable Stock: water, celery, onions, carrots, cabbage, salt, parsley, leek, sugar, garlic, thyme, bay leaves

The Progresso brand is not approved for the initial phases of the LEAP diet but is a great clean broth if you are past phase 5 or not following the LEAP diet!


After the soup contents are soft add everything to a blender and puree until creamy. I had to do this in batches because my blender is not big enough to hold all of the soup. If you have an immersion blender, this would be the perfect time to use it. When everything is blended pour back into the pot and heat back up to serve!

I enjoy croutons with my puree soups so I made some homemade croutons with crusty dutch oven bread. The soup is also great with cut up scallions.


5-Ingredient Cauliflower Soup
 
Easy 5 Ingredient Cauliflower Soup that the pickiest of eaters will enjoy!
Author:
Serves: 4
Ingredients
  • ½ T oil
  • 2 garlic cloves, minced
  • 1 medium onion, chopped
  • 1 head cauliflower, chopped
  • 32 oz clean broth or homemade broth - chicken or vegetable
  • 1 tsp salt
Instructions
  1. In dutch oven, heat oil over medium heat. Add onion and garlic. Cook until slightly browned, about 5-7 minutes.
  2. Add broth and cut up cauliflower. Bring to a boil and cover. Simmer for 20-25 minutes until cauliflower is softened.
  3. In batches, pour contents of pot in blender. Blend until smooth. Continue until whole pot is smooth.
  4. Pour each batch back into dutch oven. Add salt and stir.
  5. Heat soup and serve with sliced green onions or homemade croutons.
Notes
Nutrition information is not provided due alterations that can be made to accommodate food sensitivities.


Products:


Here are other great recipes to make with these products: Crusty Dutch Oven Bread and Zucchini Pizza Bites


What’s your favorite homemade soup?

Enjoy!

Thick Crust Pizza

Homemade Thick Pizza Crust

Thick Crust PizzaWho doesn’t love pizza? Brandon and I like to keep frozen pizza crusts in the freezer for those days when we just don’t feel like cooking! When I was going through my elimination diet one of the foods I had to trial was wheat. Through this I discovered that I can tolerate wheat which was such a relief!

There is such a stigma against wheat/gluten these days and a lack of understanding of why it is necessary for some people to cut out. What most people don’t know is that by cutting out gluten for a long period of time when it is not necessary your body starts to have a difficult time breaking it down when you add it back in. If you can tolerate gluten why wouldn’t you want to take advantage of that?

This recipe makes 2 thick crust 12-inch pizzas. Of course your could always divide it into 3 thin crust or even 4 individual pizzas if you and your family like different toppings.

The easiest way to make pizza dough is of course in a stand mixer with a hook attachment but you could always make it the old fashioned way (with your hands).

Homemade Thick Crust Pizza
 
Author:
Serves: 2 pizzas
Ingredients
  • 4C all-purpose flour
  • 1T + 1t active dry yeast
  • 1T + 1t sugar
  • 2t salt
  • 1T + 1t oil
  • 12oz warm water
  • 1t oil
Instructions
To make in stand mixer:
  1. Place flour in mixer bowl and create a well.
  2. Fill well with yeast, sugar, salt, 1T + 1t oil, and water.
  3. Attach dough hook to mixer and turn mixer on low until ingredients are combined (about 3 minutes)
  4. Turn mixer on medium speed and knead for 5-10 minutes until ball forms, push flour down as needed.
To make by hand:
  1. Place flour into large bowl and create a well.
  2. Fill well with yeast, sugar, salt, 1T + 1t oil, and water.
  3. Stir with spoon until combined (you may need to use your hands).
  4. Turn out onto floured surface and knead for 5-10 minutes by hand until ball forms.
Once you have the dough ball:
  1. Coat dough ball with 1t oil and cover with clean, dry towel.
  2. Place in warm place away from drafts until dough doubles in size, about 1 hour.
  3. Turn dough out on floured surface and punch down to remove excess air.
  4. Divide dough into 2 pieces.
  5. Roll out each piece into 12in pizza.
To make right away:
  1. Top with pizza sauce and your favorite toppings!
  2. Bake at 400 for about 12-15 minutes or until edges are brown and bottom is fully cooked.
To save for later:
  1. Pre-bake crust on pizza pan for about 5 minutes at 500 degrees until slightly brown and bottom is fully cooked.
Notes
Nutrition information is not provided due alterations that can be made to accommodate food sensitivities.


Alternatives:
There are always substitutions that you can make in order to still enjoy the foods that you love! Here are a few substitutions that you can make in this recipe.

Sugar – I didn’t specify the type of sugar because you can use cane sugar or beet sugar.
Oil – choose a mild oil that you can tolerate that doesn’t contribute a strong flavor to the pizza crust.
Examples: olive oil, refined coconut oil, sunflower oil, rice bran oil


Thick Crust Pizza 1


Give it a shot and make your own pizza crust! Not only is it better than ordering out but it has minimal ingredients and no preservatives 🙂


Products we use:

Here’s another great recipes to make with your stand mixer and smart oven: Oatmeal Breakfast Cookies


We make pretty traditional pizza. What are your favorite toppings?

Enjoy!