Chicken Fried Rice

Chicken Fried Rice

Chicken Fried RiceThe idea of Chinese food always sounds good. I always think that I love Chinese food until we order it from the typical Chinese carryout restaurant and I realize that I’m not sure what I loved about it… its heavy, salty, MSG-filled, and covered in random mystery sauces. Oh and it makes my IBS flare up!

Soo…Epiphany!

Make your own! I love homemade Chinese food because it is light, filled with veggies, flavorful and totally customizable! Totally opposite of the restaurant version.

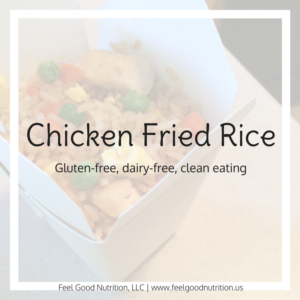
My favorite Chinese food is chicken fried rice. For this recipe I used the leftover Chinese restaurant white rice that no one eats because they always buy fried rice… If you are smart enough not to order Chinese food from a restaurant then you can make your own white rice or brown rice and use it in this recipe.

If you eat chicken and rice regularly and keep it around the house you can put this dinner together in a matter of minutes.

Chicken Fried Rice
 
Author:
Cuisine: Chinese
Serves: 4
Ingredients
  • 3C white (or brown) rice
  • 2 tsp sesame oil, divided
  • ¼ C soy sauce
  • ¼ C frozen peas
  • ¼ C frozen corn
  • 1 large carrot, small dice
  • 2 eggs
  • 1 chicken breast, cooked and diced
Instructions
  1. Heat 1 tsp sesame oil in a large pan. When hot, add frozen peas, corn and diced carrots and cook for a few minutes, until soft.
  2. Add cooked rice to the pan and mix with vegetables.
  3. Add diced chicken to the pan and heat ingredients together.
  4. Push the contents of the pan to one side. Pour remaining sesame oil (1 tsp) on empty side of the pan. Scramble eggs and add to pan. Mix eggs while cooking to scramble.
  5. Incorporate scrambled eggs in with the rice mixture until evenly combined.
  6. Pour soy sauce over contents of pan and mix again until evenly combined.
Notes
Nutrition information is not provided due alterations that can be made to accommodate food sensitivities.


Alternatives:
Chicken Fried Rice Protein – Use thin slices of beef or small shrimp in place of chicken

Vegetables – Any vegetables are fair game here! Broccoli bits, chopped onions, zucchini, etc. This is one way you can truly customize your meal!

Soy Sauce – this is an important part of the dish but there are alternatives that you can buy. There are many brands of soy sauce. Kikkoman in particular has gluten-free soy sauce and tamari that has limited ingredients. Bragg Liquid Aminos is an alternative to soy sauce and tamari that is not fermented (better alternative for those that are tyramine sensitive). Bragg Coconut Aminos is another alternative that is soy free and not fermented.


Products:


Do you make fried rice at home? What ingredients do you use?

Enjoy!


Honeydew Sorbet

Honeydew Sorbet

Honeydew SorbetLeaves are changing quickly and every morning it has been getting cooler… I’m so not ready for fall yet! This summer went by so quickly, we didn’t even get to a waterpark!

In a last ditch effort to bring back summer I thought I would make a light, refreshing summer-y dessert 🙂 Ice cream is always a go to during the summer but for those of us who are lactose intolerant, ice cream isn’t always a good idea. Don’t get me wrong, I crave (and eat) ice cream occasionally but its nice to eat dessert without feeling sick or having to run to the bathroom.

My honeydew sorbet is made with 3 ingredients (+ water… does that count?) and can be modified to meet your specific needs.

Honeydew Sorbet
 
Author:
Recipe type: Dessert
Serves: ½ gallon
Ingredients
  • 5 C honeydew, diced and chilled
  • ¾ C cane sugar
  • ¾ C water
  • 1 lemon, juiced
Instructions
  1. Create a simple syrup by heating sugar and water in a sauce pan. Pour the simple syrup in a container and refrigerate to cool. You can freeze to speed up the process - make sure not to freeze the syrup.
  2. Combine the chilled honey dew and simple syrup in a blender, add juice from 1 lemon and blend until smooth.
  3. Pour the contents of the blender into your ice cream maker and follow manufacturer instructions.
  4. Freeze sorbet until solid. Before serving, take sorbet out of the freezer about 5 minutes in advance.
Notes
Nutrition information is not provided due alterations that can be made to accommodate food sensitivities.

Making sorbet

Alternatives:
Fruit – Try using cantaloupe or watermelon to make the same different versions of this sorbet.
Sweetener – you can use honey in place of cane sugar in the same quantity. Be careful if you are sensitive to fructose! Honey is 100% fructose and so is fruit 🙂 You can also try an alternative sweetener (i.e. stevia) for a low calorie version of this refreshing dessert!


Also try our Diary-Free Fudgesicles for another delicious summer dessert!


Products:

Here is another great recipe to make with this product: Roasted Almond Chocolate Ice Cream


Let us know if you tried this with a different fruit!

Enjoy!

Crockpot Quinoa Enchilada

Crockpot Quinoa Enchilada

Crockpot Quinoa EnchiladaA couple of months ago I started part time consulting at a local migrant Head Start program. As their nutritionist, I plot all of the kids on a growth chart to identify where they fall in terms of weight for length (height). For the kids that plotted above the 85th percentile I was able to sit down one on one with the parents of the overweight/obese kids and discuss the importance of exercise and a healthy diet. Majority of these kids are getting multiple sweets per day and limited vegetables. Just a few weeks ago I was able to host a meeting with all of the parents to share my role at the school and answer any questions.

During the meeting we were raffling off a crockpot so I made a healthy twist on the classic mexican dish – enchiladas. The director of the school told me that the kids are given quinoa and really seem to like it. Quinoa cooks very similar to rice but if a complete protein – meaning that it can replace meat in a meal.

Try this recipe with: crusty dutch oven bread!

Crockpot Quinoa Enchilada
 
Author:
Cuisine: Mexican
Ingredients
Crockpot Enchilada
  • 1 cup quinoa, rinsed
  • 1 - 15oz can pinto beans, drained and rinsed
  • 1 - 15oz can corn, drained
  • 2 - 15oz cans diced tomatoes
  • 2 cups enchilada sauce
Enchilada Sauce
  • 3 cups broth
  • ¼ cup tomato paste
  • ¼ cup all purpose flour
  • 2 Tbsp allowed oil
  • 2 tsp cumin
  • ¼ tsp garlic powder
  • ¼ tsp onion powder
  • ¼ tsp paprika
  • Optional: start with ¼ tsp cayenne pepper for spice. Add more to taste.
Instructions
Enchilada Sauce
  1. In a small bowl, mix flour, cumin, garlic powder, onion powder and paprika.
  2. In medium saucepan, heat oil over medium heat.
  3. Add tomato paste and bowl of spice mix.
  4. Cook 1 minute, whisking continuously.
  5. Whisk in broth, increase heat, and bring to a light boil.
  6. Reduce to simmer. Cook about 8 minutes until slightly thickened, whisking occasionally.
  7. Add salt/pepper to taste.
Crockpot Enchilada
  1. Place pinto beans, corn, tomatoes and quinoa in a crockpot. Stir everything together and top with enchilada sauce.
  2. Cover and cook on high for 4-5 hours or on low for 8 hours.
Notes
Nutrition information is not provided due alterations that can be made to accommodate food sensitivities.

Quinoa Enchilada


Products:

Here are other great recipes to make in your crockpot: Crockpot Whole Chicken


Would love to know what you think and if you made any alterations!

Enjoy!

Crusty Dutch Oven Bread

How to Make Crusty Dutch Oven Bread

Crusty Dutch Oven BreadI found this dutch oven bread after several years of trying to perfect the art of making bread. And it truly is an art. The right amount of yeast, salt, flour and time to rise all contribute to flavor and texture of your bread. Some batches were too dense or they didn’t rise enough to look like a fancy artisan bread – more like a flat disc…

Finally, I found this recipe that is fool proof! This crusty dutch oven bread is almost impossible to screw up. It is simple – mix the ingredients together and leave it alone for about half a day. Bake it and its delicious 100% of the time.

The hardest thing about this recipe is just letting the bread sit and doing nothing!

As you could probably guess by the title, this bread is made in a dutch oven. This is the dutch oven that I use, it was a hand me down from Brandon’s mom and I make everything in it now! Bread, soups, stews, etc. Having a heavy bottom cast iron pot is great for all sorts of cooking and would be a great investment if you don’t have one already. In doing a quick google search it looks like they range in price from $25-$300+ if you want the fancy name brand Le Creuset Signature Dutch Oven.

Need something to eat with your bread? Try our 5-ingredient cauliflower soup! I like to make croutons out of my bread to add a nice crunch to this soup.

Crusty Dutch Oven Bread
 
Cook time
Total time
 
Author:
Recipe type: Bread
Serves: 12
Ingredients
  • 6 C all purpose flour
  • 3 tsp salt
  • 1 tsp active dry yeast
  • 3 C water (warm)
Instructions
  1. In a large bowl mix together flour, salt and yeast. Pour water into bowl and mix ingredients together until incorporated. Cover bowl with a clean towel and let sit in a warm place for 15-20 hours.
  2. Preheat oven to 450 degrees. Add dutch oven and lid to the oven during the preheat time. You want the dutch oven heat up as well
  3. Flour your work surface and hands. With floured hands gently remove the bread dough from the bowl. The bread can be very sticky. I find that it helps to sprinkle some flour over the top of the dough, especially around the edges of the bowl so that it drops down the sides as you pick up the dough.
  4. Shape your dough into a ball and drop it into the hot dutch oven. Put the lid back on and place it in the oven.
  5. Bake for 30 minutes with the lid on. Remove the lid and bake for another 15-20 minutes until golden brown.
  6. Remove from the oven and let cool.
Notes
I have a very large (6.5Qt) dutch oven so this recipe makes a lot of bread. If you have a smaller dutch oven you can cut the recipe in half and it still works great!

**Nutrition information is not provided due alterations that can be made to accommodate food sensitivities.


Alternatives:
Flour – I wouldn’t get too crazy with gluten free flour blends unless you have a blend that you use as all-purpose flour. I have not had a chance to experiment with gluten free bread at this time. You can use whole wheat flour for a different flavor profile. This would be used in the same quantity.

Additions: 
If you are feeling fancy, add some spices/herbs to your bread like garlic, basil, oregano, etc!


Products:

Here are other great recipes to make with these products: Cauliflower Soup


Did you add any other flavorings? We would love to know what you tried!

Enjoy!

5-Ingredient Cauliflower Soup

5-Ingredient Cauliflower Soup

5-Ingredient Cauliflower SoupGrowing up my dad would always make soup with the Thanksgiving turkey leftovers or after having a roast chicken for dinner. They were always so good! I was intimidated by making soups but one day I just decided to jump in and try it out. At first I made a green chicken chili and then I royally screwed up a black bean chili (who knew a whole can of ancho chiles could be SOO spicy… whoops!)

There has been a big kick with cauliflower lately. Roasted cauliflower. Cauliflower “mashed potatoes”. Cauliflower pizza crust. etc. etc. etc. Well you should try my cauliflower soup! I wish I could get Brandon (remember.. the veggie hater) to even give it a try but because he knows the ingredients he won’t even give it a shot.

I like to cut up all of the ingredients first so that I can throw them all in the pan at the right time. After the soup cooks for about 20-25 minutes you will need to blend the soup so your cuts don’t have to be beautiful but they should be relatively uniform so that they cook at the same pace. It is not good to have some super mushy and others raw… been there, done that!


Heat 1/2 T of the oil of your choice in a heavy pot/dutch oven. For this recipe I would use a mild flavored oil: olive oil, unflavored coconut oil, sunflower oil, rice bran oil, corn oil.

Brown garlic and onion in the pot. This process takes about 5-7 minutes. Be careful not to burn them. Browning the onion and garlic gives the soup an additional depth of flavor.

Once brown, add broth and chopped cauliflower. I prefer to use my own broth if I have some available but in a pinch I do keep some clean broths on hand.


Here a couple of brands that I like:
Swanson Chicken Cooking Stock: chicken stock, salt, carrots, cabbage, onions, celery, celery leaves, parsley
Progresso Vegetable Stock: water, celery, onions, carrots, cabbage, salt, parsley, leek, sugar, garlic, thyme, bay leaves

The Progresso brand is not approved for the initial phases of the LEAP diet but is a great clean broth if you are past phase 5 or not following the LEAP diet!


After the soup contents are soft add everything to a blender and puree until creamy. I had to do this in batches because my blender is not big enough to hold all of the soup. If you have an immersion blender, this would be the perfect time to use it. When everything is blended pour back into the pot and heat back up to serve!

I enjoy croutons with my puree soups so I made some homemade croutons with crusty dutch oven bread. The soup is also great with cut up scallions.


5-Ingredient Cauliflower Soup
 
Easy 5 Ingredient Cauliflower Soup that the pickiest of eaters will enjoy!
Author:
Serves: 4
Ingredients
  • ½ T oil
  • 2 garlic cloves, minced
  • 1 medium onion, chopped
  • 1 head cauliflower, chopped
  • 32 oz clean broth or homemade broth - chicken or vegetable
  • 1 tsp salt
Instructions
  1. In dutch oven, heat oil over medium heat. Add onion and garlic. Cook until slightly browned, about 5-7 minutes.
  2. Add broth and cut up cauliflower. Bring to a boil and cover. Simmer for 20-25 minutes until cauliflower is softened.
  3. In batches, pour contents of pot in blender. Blend until smooth. Continue until whole pot is smooth.
  4. Pour each batch back into dutch oven. Add salt and stir.
  5. Heat soup and serve with sliced green onions or homemade croutons.
Notes
Nutrition information is not provided due alterations that can be made to accommodate food sensitivities.


Products:


Here are other great recipes to make with these products: Crusty Dutch Oven Bread and Zucchini Pizza Bites


What’s your favorite homemade soup?

Enjoy!

My Food Sensitivity Story

Food Sensitivity Story

Hi I’m Carie! Registered Dietitian, self-proclaimed foodie, former IBS sufferer and green bean fanatic. For my obligatory first blog post, I’d like to share my nutrition journey you with!

Be warned…It was a messy one.

I grew up in a foodie family. We were always fairly health conscious but I was never the thinnest or prettiest girl. In high school I was the girl on the verge of an eating disorder – limiting myself to less than 1000 calories a day in secret and sharing food with my friends so I didn’t have to eat as much. I tried the fad diets of the time – mainly the Atkins Diet.

Toward the end of high school I started suffering from digestive issues – I’m talking gas, upset stomach, diarrhea every day (I know, TMI! But I’m a dietitian – talking about poop is practically in the job description). Now I started journaling in a different way. Writing down everything that I ate and cutting out nutrition labels to compare the ingredients. Highlighting commonalities.  Nothing was adding up.

This continued through the beginning of college. I saw an allergist for food allergy testing (skin testing – which I now know is SO not reliable!). From there my parents sent me to a GI specialist – there I sat with my lists and labels. SHE DIDN’T EVEN LOOK AT THEM! That day I was diagnosed with IBS and handed one sheet of paper titled ‘FODMAP diet’. No explanation. No direction.

Thank you Dr. Google for explaining IBS and the FODMAP Diet.

Thanks to Pinterest I was able to find recipes and bloggers who were well versed in FODMAPs. I experimented with this diet for the rest of my college career but found it to be very restrictive without relieving much of my symptoms. Just like my clients tell me now – I would prefer a diet that tells me exactly what to avoid so that I can skip the guessing game.

Through this crazy journey I was studying to be a dietitian. With my new found title and existing love of nutrition I became interested in integrative and functional nutrition. Through a special blood test I was able to eliminate the guessing game. Exactly what I needed!

I continue to follow a diet that tailored to my personal results and have been able to add new foods to my diet regularly and maintained a symptom free life!

This experience has shaped the way that I approach nutrition and because of this I founded my own nutrition counseling company, Feel Good Nutrition, LLC! I look forward to sharing clean recipes with all of you and discussing ways to modify recipes to meet your specific needs!

My Food Sensitivity Story1